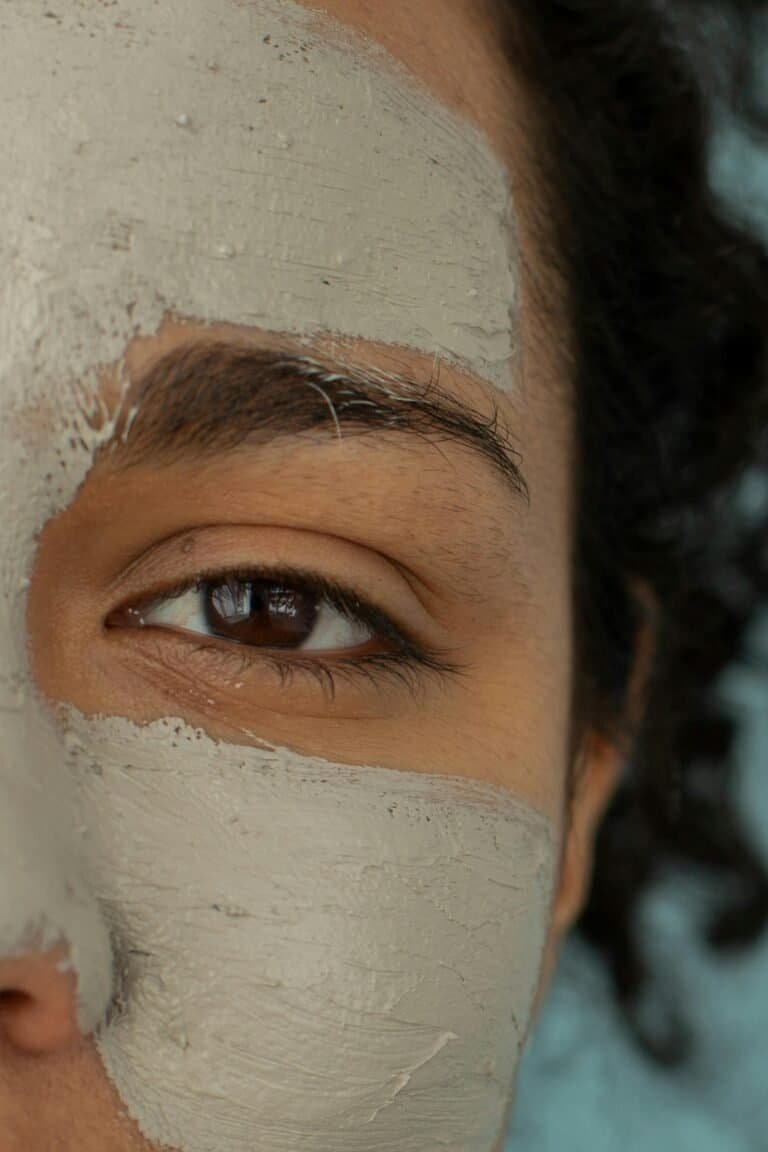
Natural Skincare Routine for Hyperpigmentation: A Step-by-Step Guide
Struggling with dark spots, uneven skin tone, or stubborn patches of discoloration? You’re certainly not alone. Hyperpigmentation affects millions of people worldwide, and while there are countless treatment options available, many are turning to natural approaches for their gentle yet effective results.
If you’re new to hyperpigmentation treatment, we recommend starting with our foundational guide, “How to Treat Hyperpigmentation Naturally: A Complete Guide,” which explains the science behind dark spots and introduces the four essential pillars of natural treatment. This current guide builds on that foundation to provide you with specific, actionable routines you can implement immediately.
For those who’ve already read our foundational guide, you’ll know that effective hyperpigmentation treatment requires addressing four key areas: photoprotection, melanin production regulation, cellular environment optimization, and superficial melanin removal. Now we’ll translate that knowledge into practical daily skincare routines you can start using today.
This comprehensive guide will help you:
- Create morning and evening routines that incorporate all four treatment pillars.
- Target dark spots effectively without compromising your skin barrier.
- Prevent new hyperpigmentation while treating existing spots.
- Support your skin’s natural healing and regulatory processes.
- Customize your regimen to match your skin type and concerns.
Our step-by-step approach combines the scientific insights covered in our foundational guide with practical application strategies. You’ll learn exactly when and how to use each ingredient we discussed, creating a coordinated routine that maximizes their synergistic benefits.
Are you prepared to convert your comprehension of hyperpigmentation into practical practices? Let’s begin building a personalized routine tailored to your needs. While natural treatments can be highly effective, results typically appear gradually over 8 to 12 weeks of consistent use. This guide emphasizes sustainable practices that help your skin maintain resilience over time.

Essential Natural Ingredients for Your 4-Pillar Hyperpigmentation Treatment
Before diving into specific routines, let’s organize your natural ingredients into a practical treatment framework. Now that you understand the science behind hyperpigmentation from our foundational guide, it’s time to translate that knowledge into actionable product selections.
Think of this section as your shopping guide—helping you choose effective natural products that address each of the four pillars of hyperpigmentation treatment. While you don’t need every ingredient mentioned, having at least one option from each pillar creates a comprehensive approach.
If you haven’t had the chance to read our foundational guide yet, we recommend doing so. We strongly recommend starting with “How to Treat Hyperpigmentation Naturally: A Complete Guide” to understand the science and ingredients we’ll be working with in this routine guide. This knowledge will help you make more informed decisions about your skincare routine and better understand why each step is important.
Pillar 1: Protection & Prevention Ingredients
Antioxidant Serums
- Vitamin C, E, and Ferulic Acid combination (look for L-ascorbic acid 10-20%)
- Silymarin (Milk Thistle Extract) formulations
- Products containing Scutellaria Baicalensis or Edelweiss Extract
Sun Protection
- Broad-spectrum mineral sunscreen with zinc oxide and/or titanium dioxide (SPF 30)
- Protective clothing, wide-brimmed hats, and sunglasses
Internal Support
- Polypodium Leucotomos Extract supplements (240-480mg daily)
Pillar 2: Melanin Production Regulation Ingredients
Tyrosinase Inhibitors
- Kojic acid (1-4%) serums or treatments for evening use
- Licorice root extract products listing “Glabridin” at 0.1-0.5%
- Alpha arbutin (2%) formulations that can be used morning and evening
Melanocyte Regulators
- Niacinamide (4-5%) serums or treatments
- N-Acetyl Glucosamine (NAG) (2%) products
- Pro tip: Look for products containing both ingredients together for maximum efficacy
Pillar 3: Skin Barrier Improvement Ingredients
Barrier-Strengthening Products
- Moisturizers containing ceramides
- Products with essential fatty acids (evening primrose oil, etc.)
- Formulations containing beta-glucans
- Hydrating ingredients like glycerin and urea (5-10%)
- Niacinamide (2%) – enhances the skin’s natural production of ceramides, fatty acids, and cholesterol, strengthening the barrier from within
Anti-Inflammatory Agents
- TECA (Titrated Extract of Centella Asiatica) – the standardized form containing active triterpenes
- Pure aloe vera gel or products with high aloe content
- Niacinamide serves multiple functions across pillars: regulating melanin production (4-5%), reducing inflammation (4-5%), and strengthening the skin barrier (2%)
Pillar 4: Removal of Existing Pigmentation Ingredients
Gentle Exfoliants
- Products with fruit enzymes (papain from papaya or bromelain from pineapple)
- Willow bark extract (natural source of salicylic acid)
- Urea (10-15%) formulations
- Glycolic acid (5-10%) products
- Salicylic acid (0.5-2%) formulations (particularly good for post-acne hyperpigmentation)
Cell Renewal Boosters
- Rosehip oil (CO₂ extracted or cold-pressed)
- Sea buckthorn seed oil
- Sea buckthorn berry/fruit oil (use at 1-5% concentration due to intense color)
How to Layer Your Arsenal Effectively
The order in which you apply your ingredients significantly impacts their effectiveness. Here’s a simple guide to layering:
Morning Priority Sequence
- Antioxidants (first layer after cleansing)
- Melanocyte regulators (niacinamide + NAG)
- Tyrosinase inhibitors
- Hydration & barrier support
- Sun protection (always the final step)
Evening Priority Sequence
- Gentle exfoliants (2-3 times weekly)
- Melanocyte regulators (niacinamide + NAG)
- Tyrosinase inhibitors
- Cell renewal boosters
- Barrier repair ingredients
Powerful Combinations & Ones to Avoid
Synergistic Pairs That Work Well Togethe
- Vitamin C + Vitamin E + Ferulic acid (powerful antioxidant protection system)
- Niacinamide + N-acetyl glucosamine (enhances effects by up to 35%)
- Kojic acid + alpha arbutin (complementary tyrosinase inhibition)
- Alpha arbutin + licorice root extract (gentle yet effective brightening)
- Aloe vera + Centella asiatica (comprehensive anti-inflammatory support)
Combinations to Approach with Caution:
- Multiple exfoliating ingredients in one session (can cause irritation)
- More than two tyrosinase inhibitors at once (increased irritation risk)
- Exfoliation + strong brightening ingredients on the same day (potential for irritation)
Building Your Initial Arsenal
For Photoprotection (Pillar 1):
- Polypodium leucotomos supplement
- An antioxidant serum (vitamin C+E+ferulic acid)
- A broad-spectrum mineral sunscreen (SPF 30)
For Melanin Production Control (Pillar 2):
- A product combining niacinamide (4-5%) and NAG (2%)
- One tyrosinase inhibitor (alpha arbutin, licorice root extract, or kojic acid)
For Cellular Environment Support (Pillar 3):
- A gentle cleanser with anti-inflammatory ingredients
- A barrier-supporting moisturizer with ceramides or niacinamide (2%)
- A treatment with Centella asiatica or aloe vera
For Superficial Melanin Elimination (Pillar 4):
- One gentle exfoliating product (fruit enzymes, willow bark, or urea)
- A cell-renewal oil (rosehip and/or sea buckthorn)
Pro Tip: Introduce new ingredients one at a time, waiting 5-7 days between additions to monitor how your skin responds. Start with lower concentrations and gradually increase as tolerated.
Storage and Stability Tips
To ensure the effectiveness of your natural ingredients:
- Keep vitamin C serums in dark, airtight containers
- Store oils in cool, dark places to prevent oxidation
- Check products regularly for color changes or unusual smells
- Note expiration dates and period-after-opening symbols
- Consider refrigerating antioxidant products for extended shelf life
In the next sections, we’ll explore how to incorporate these ingredients into practical morning and evening routines for maximum effectiveness. Remember, while it might be tempting to use everything at once, a carefully planned approach using select ingredients will yield better results than overwhelming your skin with too many actives.
Your Morning Routine: Focus on Protection and Prevention
Your morning skincare routine sets the tone for how your skin interacts with environmental stressors throughout the day. When addressing hyperpigmentation, this routine should prioritize protection while actively treating existing dark spots.
The morning is when your skin needs maximum defense against the primary triggers of hyperpigmentation: UV radiation, blue light, pollution, and oxidative stress. By creating a strategic morning routine, you build a powerful shield against these aggressors while gently regulating melanin production.
Step-by-Step Morning Protocol
1. Gentle Cleansing
Begin with a mild, non-stripping cleanser that respects your skin barrier:
- Choose formulas with soothing ingredients like aloe vera, Centella Asiatica, glycerin, bisabolol, urea, glycyrrhetinic acid, allantoin, or panthenol.
- Use lukewarm water (hot water can trigger inflammatory responses that worsen pigmentation).
- Keep cleansing brief—30-60 seconds is sufficient for morning cleansing.
- Pat dry gently with a clean towel, leaving skin slightly damp for better product absorption.
Pro tip: If your skin tends to be dry or sensitive, consider a simple aloe vera/water rinse instead of a cleanser in the morning to preserve your natural moisture barrier.
2. Antioxidant Protection Layer
Apply your antioxidant serum to slightly damp skin.
- The combination of vitamins C and E and ferulic acid provides protection against free radicals that trigger hyperpigmentation. You can also use a silymarin-based product.
- Allow 1-2 minutes to absorb before moving to the next step.
Application technique: Gently massage into the skin rather than rubbing harshly. Pay special attention to areas with existing hyperpigmentation.
3. Melanin-Regulating Layer
Next, apply your niacinamide (4-5%) + NAG (2%) product.
- This powerful combination helps inhibit the transfer of melanin within the skin.
- It also strengthens your skin barrier.
- Reduces inflammatory mediators that can trigger excess pigmentation.
- Creates an ideal foundation for subsequent treatment ingredients.
Pro tip: If using separate products, apply niacinamide first, wait 30 seconds, and then apply NAG. However, formulations containing both ingredients together are optimal for synergistic effects.
4. Treatment Layer
Now it’s time to directly target hyperpigmentation with tyrosinase inhibitors. Start with a single-ingredient approach, then progress to combinations as your skin adapts:
For beginners (first 2-4 weeks):
- Choose ONE: alpha arbutin (2%) OR licorice root extract with Glabridin (0.1-0.5%).
- These gentle options are ideal for sensitive skin and prevention-focused routines.
For established Layer routines (after 4+ weeks):
- Gentle Combination: Alpha arbutin (2%) + licorice root extract (Glabridin 0.1-0.5%)
- Moderate Strength: Kojic acid (1-2%) + alpha arbutin (2%)
- Maximum Strength: Kojic acid (2-4%) + licorice root extract with Glabridin 0.1-0.5% (for resilient skin and stubborn pigmentation)
Important: Never use more than two tyrosinase inhibitors simultaneously. Allow 2-3 weeks of testing before switching between options or increasing strength. If irritation occurs, change the option or reduce it to single-ingredient use.
5. Hydration & Barrier Support
Apply a lightweight moisturizer with barrier-supporting ingredients.
- Look for formulations containing ceramides, beta-glucans, and niacinamide (2%).
- Products with TECA and aloe vera help calm inflammation while supporting hydration.
- Texture should be appropriate for your skin type—lighter gels for oily skin, richer creams for dry skin.
- This step helps seal in active ingredients while preparing skin for sun protection.
Application tip: Use gentle pressure, avoiding pulling or stretching the skin, which can exacerbate inflammation.
6. Sun Protection (Most Critical Step)
This final step is non-negotiable—without it, all other treatments will fail. Choose one or both options:
Option 1: Mineral Sunscreen
- Apply broad-spectrum zinc oxide/titanium dioxide sunscreen (¼ teaspoon for face).
- Look for formulations with iron oxides for visible light protection.
- Choose SPF 30 and reapply every two hours outdoors.
- Complement with hats and sunglasses for physical protection.
Option 2: Internal Photoprotection
- Take a Polypodium leucotomos extract 30 minutes before sun exposure.
- Dosage: 240mg daily for standard protection, 480mg for extended outdoor activities
- Provides systemic photoprotection from within
- Especially valuable for those with stubborn hyperpigmentation
Essential reapplication: Set a reminder to reapply sunscreen every 2 hours when outdoors or after swimming or sweating heavily. Without consistent reapplication, all your other hyperpigmentation treatments will have limited effectiveness
Important Morning Routine Notes
Timing Tips:
- Allow 1-2 minutes between treatment layers for optimal absorption.
- Complete your routine at least 15 minutes before sun exposure.
- Total routine time: approximately 10-15 minutes
Adjustments for Active Days:
- If you’ll be outdoors extensively, consider taking Polypodium leucotomos extract (240-480mg) 30 minutes before exposure.
- Double down on physical protection (clothing, hats, shade).
- Pack sunscreen for reapplication.
Remember that consistency matters more than complexity. A simple routine performed faithfully every morning will yield better results than an elaborate routine used sporadically. If you’re short on time, never skip the antioxidant and sun protection steps—these form the essential foundation of hyperpigmentation prevention.
Evening Routine for Hyperpigmentation Repair
While your morning routine focuses on protection, your evening skincare ritual is dedicated to active repair and treatment. Nighttime is when your skin naturally enters restoration mode, with increased blood flow and cell regeneration—making it the ideal time to address existing hyperpigmentation more aggressively.
Without daytime environmental stressors to contend with, you can focus on ingredients that remove pigmented cells, regulate melanin production, and strengthen your skin barrier overnight. This is also when you’ll incorporate gentle exfoliation to enhance the penetration and effectiveness of your treatment ingredients.

Step-by-Step Evening Protocol
1. Thorough Cleansing
Begin with a gentle but effective cleanse to remove all traces of makeup and environmental pollutants:
- Use lukewarm water (hot water can trigger inflammation).
- Choose a cleanser that effectively removes makeup but doesn’t strip the skin.
- Consider double cleansing if you wear heavy makeup: first with an oil-based cleanser, followed by a gentle water-based cleanser.
- Pat skin until just slightly damp—not completely dry—for optimal product absorption.
Pro tip: Take an extra 30 seconds to massage your cleanser in using gentle upward circles. This improves circulation and helps remove surface debris without harsh scrubbing.
2. Exfoliation (2-3 times per week)
Incorporate gentle exfoliation to remove pigmented cells and enhance penetration of your treatment ingredients. Choose the option that best suits your skin type:
Gentle Options:
- Fruit enzymes (papain or bromelain): Leave it on for 5 to 15 minutes before rinsing.
- Willow bark extract: Use products containing this natural BHA alternative.
- Urea (10-15%): Functions as both a gentle exfoliant and hydrator.
Moderate Options:
- Glycolic acid (5-7% for beginners, 7-10% for experienced users): Best for dry, sun-damaged skin
- Salicylic acid (0.5-2%): Ideal for oily, acne-prone skin to prevent post-inflammatory hyperpigmentation
Important: Never exfoliate more than 3 times weekly, and always skip this step when skin feels sensitive or irritated. Start with once-weekly application and gradually increase frequency as your skin builds tolerance.
3. Treatment Layers
After exfoliation (or directly after cleansing on non-exfoliation nights), apply your treatment layers:
First Treatment Layer: Melanin Regulation
- Apply your niacinamide (4-5%) + NAG (2%) combination.
- This helps control the transfer of pigment within the skin.
- It also provides anti-inflammatory benefits and supports the skin barrier.
- Wait 30—60 seconds before applying the next layer.
Second Treatment Layer: Tyrosinase Inhibition
Choose one combination based on your skin’s tolerance and pigmentation severity:
- Gentle Approach: Alpha arbutin (2%) + licorice root extract
- Moderate Approach: Kojic acid (1-2%) + alpha arbutin (2%)
- Intensive Approach: Kojic acid (2-4%) + licorice root extract
Pro tip: Concentrate these treatments on areas with hyperpigmentation. For larger patches, you can apply them all over, but for isolated spots, you can use a more targeted application.
4. Barrier Repair & Cell Renewal
Finish with ingredients that support barrier function and enhance cell turnover:
Option 1: Separate Application
- Apply a barrier-supporting moisturizer with beta-glucans, ceramides, or 2% niacinamide.
- Follow with 2-3 drops of cell renewal oil (rosehip and sea buckthorn).
Option 2: Combined Application
- Mix 2-3 drops of cell renewal oil into your moisturizer.
- Apply this combination all over or just on affected areas.
- This method is particularly beneficial for dry skin types.
Pro tip for cell renewal oils: Rosehip oil supports overall renewal with natural trans-retinoic acid, while sea buckthorn oil provides intense antioxidant protection. Sea buckthorn berry oil has an orange color that may temporarily tint the skin, so it’s best used in the evening.
Important Evening Protocol Notes
Timing Guidelines:
- Allow 2-3 minutes between treatment layers for optimal absorption.
- Complete your routine at least 30 minutes before bedtime to avoid product transfer to pillowcases.
- Total routine time: 15-20 minutes
Signs to Watch For:
- Tingling that persists beyond a few minutes: Reduce active ingredient concentration or frequency.
- Excessive dryness or flaking: Increase moisturizing layers and decrease exfoliation.
- Increased sensitivity: Skip exfoliation and focus on barrier repair and cell renewal steps for a few weeks.
Remember that nighttime is when your skin does the majority of its repair work. By supplying the right ingredients before sleep, you provide your skin with the tools it needs to address hyperpigmentation while you rest. Consistency with your evening routine is just as important as your morning protection—together, they create a comprehensive approach to treating even the most stubborn forms of hyperpigmentation.
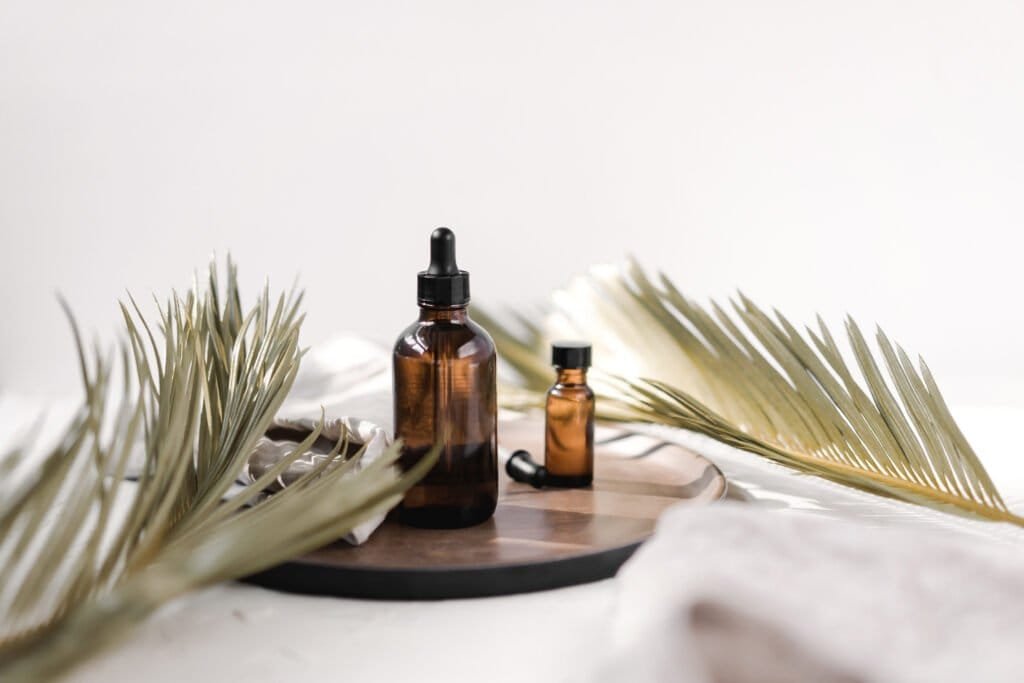
A DIY oil serum for cell renewal and barrier repair
Creating your own specialized oil serum allows you to harness the synergistic benefits of natural oils at optimal concentrations. This powerful blend combines cell renewal boosters with barrier-repairing ingredients to address hyperpigmentation while you sleep. The carefully calibrated formula maximizes effectiveness while maintaining stability.
Base Formula (30g/1oz bottle)
Core Active Ingredients:
- Rosehip seed CO₂ extract (35%): 10.5g
- Sea buckthorn seed CO₂ extract (35%): 10.5g
- Sea buckthorn fruit CO₂ extract (5%): 1.5g
Supporting Carrier Oils:
- Tamanu oil (10%): 3g
- Pumpkin seed oil (7%): 2.1g
- Rice bran oil (7%): 2.1g
Stability Enhancer:
- Vitamin E (1%): 0.3g
Optional Addition:
- Essential oil of choice (0.2%): 0.06g (approximately 1-2 drops)
- Recommended: Helichrysum italicum or lavender essential oil for additional skin-soothing benefits
Why These Ingredients Work Together
Active CO₂ Extracts:
- Rosehip seed extract (35%): Contains natural trans-retinoic acid that supports cell turnover without irritation. The CO extraction process preserves delicate compounds that conventional extraction methods would damage, making it significantly more potent than standard rosehip oil.
- Sea buckthorn seed extract (35%): Rich in omega-3, 6, 7, and 9 fatty acids that are essential for barrier repair. These fatty acids help restore the skin’s lipid balance and strengthen the moisture barrier, creating an optimal environment for melanocytes to function normally.
- Sea buckthorn fruit extract (5%): Provides potent carotenoids (giving it the characteristic orange color) that offer powerful antioxidant protection. This extract helps protect against oxidative stress that can trigger hyperpigmentation while supporting skin regeneration.
Supporting Carrier Oils:
- Tamanu oil (10%): Has special compounds called calophyllolide that help cells heal and reduce inflammation, which is especially beneficial for post-inflammatory hyperpigmentation.
- Pumpkin seed oil (7%): Rich in zinc and antioxidants that support overall skin health and barrier function while regulating sebum production.
- Rice bran oil (7%): Offers a light, non-greasy texture and is naturally rich in ceramides, squalene, and antioxidant vitamin E. The high gamma-oryzanol content helps even skin tone and improve barrier function.
Stability Enhancer:
- Vitamin E (1%): Acts as a natural preservative, extending the shelf life of your serum while providing additional antioxidant benefits.
Preparation Instructions
Materials Needed:
- 30ml dark amber or cobalt blue glass bottle with dropper
- Digital scale capable of measuring to 0.1g precision
- Small glass beaker or measuring cup for weighing oils
- Small stainless-steel spatula for stirring
- Measuring pipettes
- Sanitizing alcohol (95% ethanol)
Step-by-Step Process:
Sanitize all equipment
- Wipe down all tools, the beaker, and bottle with 95% ethanol
- Allow to air dry completely before beginning
Measure and combine carrier oils first
- Using your digital scale and glass beaker, weigh tamanu, pumpkin seed, and rice bran oils
- Stir gently with the stainless-steel spatula to combine
Add CO₂ extracts in sequence
- Add rosehip seed CO₂ extract
- Add sea buckthorn seed CO₂ extract
- Finally, add sea buckthorn fruit CO₂ extract (add this last as its vivid color makes it easier to see if it’s fully incorporated)
Incorporate vitamin E
- Add vitamin E oil and stir gently
Add essential oil if using
- Add 0.06g (approximately 1-2 drops) your chosen essential oil
- Stir gently for 30 seconds to ensure even distribution
Transfer to storage bottle
- Carefully pour your serum directly from the beaker into the dark glass bottle
- Secure the dropper cap tightly
Storage and Usage Guidelines
Storage
- Keep in a cool, dark place away from direct sunlight
- Refrigeration will extend shelf life (recommended)
- Use within 6 months for maximum potency
Application
- Apply 4-5 drops to clean, slightly damp skin in your evening routine
- Can be used directly on hyperpigmentation areas or all over face
- Alternatively, mix 2-3 drops into your evening moisturizer
- Always perform a patch test before first full application
Pro Tips for Maximum Benefits
- For deeper penetration: Apply to slightly damp skin.
- For sensitive skin: Start with just 2-3 drops every other night.
- For stubborn spots: Apply a tiny amount directly to hyperpigmentation before your regular amount for the rest of your face.
- To avoid staining: Allow the serum to fully absorb (10-15 minutes) before coming into contact with pillowcases or clothing, as the sea buckthorn fruit oil can temporarily tint fabric.
This custom oil serum complements your hyperpigmentation routine by supporting your skin’s natural regeneration process while you sleep, helping to fade existing dark spots while preventing new ones from forming.
Customizing Your Routine
There is no universal solution for creating an effective hyperpigmentation regimen. Your skin’s unique needs, the type and severity of your hyperpigmentation, and even seasonal changes all impact how you should approach treatment. In this section, we’ll explore how to personalize the 4-pillar framework to address your specific situation.

Adjustments for Different Skin Types
Dry Skin Modifications
Dry skin requires additional hydration and barrier support while treating hyperpigmentation.
- Product Texture: Choose richer, oil-based formulations that provide both treatment and moisture.
- Exfoliation: Limit to once weekly, focusing on gentle options like fruit enzymes or low-percentage (5-7%) glycolic acid.
- Application Technique: Apply a hydrating toner before and a rich moisturizer after treatment ingredients.
- Buffering Option: Mix brightening treatments with your moisturizer to reduce potential irritation.
Oily/Combination Skin Adaptations
Oily skin typically tolerates active ingredients better but requires formulations that won’t exacerbate oiliness.
- Product Texture: Opt for gel, serum, or light lotion textures rather than creams or oils.
- Exfoliation: Can often tolerate more frequent exfoliation (2-3 times weekly), with salicylic acid being particularly beneficial.
- Oil Control: Look for niacinamide formulations at 4-5% concentration, which helps regulate sebum while addressing pigmentation.
- Oil Serum: Use only in the evening, reducing overall application to 2-3 drops; consider increasing pumpkin seed oil percentage (to 12%).
- Balance: Don’t strip the skin with harsh cleansers, as this can trigger increased oil production and inflammation.
Sensitive Skin Considerations
Sensitive skin requires a much more cautious approach to hyperpigmentation treatment:
- Introduction Schedule: Integrate one new product every two weeks.
- Concentration: Start with the lowest effective concentrations (e.g., 1% kojic acid instead of 2-4%).
- Testing: Always conduct a 48-hour patch test on your inner arm before applying new products to your face.
- Exfoliation: Begin with urea (10-15%) or very gentle fruit enzymes no more than once weekly.
- Barrier First: Establish a solid barrier repair routine before introducing active brightening ingredients.
- Soothing Ingredients: Prioritize products containing TECA, aloe vera, and beta-glucans.
- Skip Days: Consider alternating treatment days with recovery days, especially when first establishing your routine.
Seasonal Adjustments
Summer Intensification:
During high UV months, adjust your approach to prioritize protection:
- Sun Protection: Double down with both mineral sunscreen AND internal supplementation (Polypodium leucotomos at 480mg).
- Antioxidants: Consider the morning AND evening application of antioxidant serums.
- Treatment Timing: Move stronger tyrosinase inhibitors to evening use only.
- Hydration: Increase hydrating ingredients to counter moisture loss and potential inflammation.
- Exfoliation: Reduce frequency slightly to minimize photosensitivity.
Winter modification
Colder months often mean drier air and different skin needs:
- Barrier Support: Increase moisturizing ingredients to combat indoor heating and low humidity.
- Treatment Opportunity: If skin tolerates it well, you may slightly increase treatment intensity during low-UV months.
- Oil Balance: Adjust your DIY serum by adding more nourishing oils like rosehip (up to 40%).
- Humidifier: Use one in your bedroom to prevent moisture loss overnight.
Adjusting for Hyperpigmentation Severity
Mild Hyperpigmentation approach
For faint discoloration or prevention-focused routines:
- Concentration: Use lower concentrations of actives (alpha arbutin 1-2%, kojic acid 1%).
- Frequency: Apply treatments once daily rather than morning and night.
- Focus: Emphasize prevention (antioxidants and sun protection) over treatment.
- Exfoliation: 1-2 times weekly is sufficient.
Moderate Hyperpigmentation Strategy
For noticeable but not severe pigmentation:
- Complementary Ingredients: Use strategic combinations (niacinamide+NAG, alpha arbutin+licorice extract).
- Consistency: Apply treatments both morning and evening as tolerated.
- Exfoliation: Maintain a regular schedule of 2-3 times weekly.
- Internal Support: Consider adding Polypodium leucotomos supplementation daily.
Severe Hyperpigmentation Treatment
For long-standing or intense pigmentation:
- Maximum Strength: Use higher concentration combinations (kojic acid 2-4% with complementary ingredients).
- Comprehensive Approach: Implement all four pillars diligently, without skipping steps.
- Professional Guidance: Consider consulting a dermatologist to rule out conditions requiring prescription treatment.
- Layering: Apply multiple targeted treatments, allowing proper absorption time between layers.
Treatment Intensity Guidelines
Signs to Increase Intensity
- No irritation after 4 weeks of consistent use
- Minimal visible progress despite consistency
- Skin barrier remains healthy (no excessive dryness, flaking, or sensitivity)
- Good tolerance for current routine
Signs to Decrease Intensity
- Persistent redness lasting more than an hour after application
- Burning, stinging, or itching sensations
- Increased sensitivity to products previously well-tolerated
- Dry, tight feeling that persists despite moisturizing
- New breakouts or congestion
Progress Monitoring Tips
Tracking your results systematically helps you determine what’s working.
- Take monthly photos in the same lighting, position, and time of day.
- Keep a simple skin journal noting:
- Products used and frequency
- Any reactions or improvements
- Environmental factors (travel, stress, etc.)
- Hormonal fluctuations that might impact skin
- Note seasonal transitions that may affect your results.
- Document any potential triggers that worsen pigmentation.
- Set realistic timeframes—significant improvement typically requires at least 12 weeks of consistent treatment.
The Mindset for Success
Keep in mind that treating hyperpigmentation naturally is a journey, not a quick fix. The gentler approach may take longer but often yields more sustainable results with fewer side effects. Focus on these principles for long-term success:
- Consistency over intensity: Regular application of moderate-strength products outperforms occasional use of high-strength ones.
- Prevention alongside treatment: Always maintain sun protection even as spots fade.
- Patience: Some forms of hyperpigmentation, particularly melasma, may never completely resolve but can be significantly improved and managed.
- Adaptability: Be willing to adjust your routine as your skin’s needs change or as you see results.
By thoughtfully customizing the 4-pillar approach to your specific needs, you create a sustainable, effective routine that addresses not just visible hyperpigmentation but the underlying factors that cause it—leading to healthier, more radiant skin over time.
Conclusion
Creating an effective natural hyperpigmentation routine isn’t about finding the perfect product—it’s about understanding your skin and consistently applying the right combination of ingredients across all four treatment pillars.
Keep in mind that treating hyperpigmentation naturally is a journey, not a quick fix. The gentle, science-backed approach we’ve outlined requires patience, but it delivers sustainable results without the harsh side effects often associated with aggressive treatments. Most people begin seeing noticeable improvements after 8–12 weeks of consistent application.
Your success depends on
- Consistency: Daily application of your chosen routine is more important than using the most expensive products.
- Sun protection: This remains non-negotiable—even the most powerful natural treatments will fail without proper photoprotection.
- Gradual progression: Start conservatively and adjust based on your skin’s response.
- Holistic approach: Address all four pillars rather than focusing on just one aspect of treatment.
The beauty of natural hyperpigmentation treatment lies in its adaptability. Whether you’re dealing with post-acne marks, sunspots, or melasma, the principles remain the same—protect, regulate, support, and renew. You can customize the intensity and specific ingredients based on your unique needs and skin tolerance.
Be patient with the process and trust in the power of consistency. Every application of sunscreen, every gentle exfoliation, and every nourishing oil contributes to your skin’s journey toward more even tone and improved health.
For a more profound understanding of the science behind these routines, revisit our foundational guide, “How to Treat Hyperpigmentation Naturally.” Together, these resources provide everything you need to address hyperpigmentation naturally and effectively.
Your path to clearer, more radiant skin begins with your very next skincare routine. Step by step, you can achieve this.
Other Posts You May Like:
- Natural Sunburn Treatment: 5 Powerful Plant Extracts for Fast Relief & Healing
- 7 Best Natural Substances for Holistic Sun Protection and skin cancer prevention
- Hair Washing Frequency: The Science-Based Guide for Every Hair Type (Part 1)
- Simple 3-Step Regimen to Naturally Get Rid of Dandruff
- 5 steps routine for healthy scalp how to maintain strong shiny hair
- The Truth About Sunscreen: 8 Facts The Industry Doesn’t Want You To Know
- 5 Steps Routine for healthy Scalp: How to Maintain Strong, Shiny Hair
- Photosensitivity and Skin Phototype: Understanding and preventing Sun Reactions
- Hydroquinone-Induced Hyperpigmentation in Melanin-Rich Skin: Causes, Treatment, and Prevention
- Sun Protection for Black Skin: Why Cancer prevention Alone May Not Justify Sunscreen Use
- How to Treat Hyperpigmentation Naturally: A Complete Guide